Filling
[NOTE: This tutorial is for meshmixer02. meshmixer03 works in a similar way, but with some changes. Click the little + sign to the right of the Tool Name bar in meshmixer03 to get in-app help.]
The Drag-and-Drop, Erase, and Part Maker tools in meshmixer all involve creating an interior surface to fill a hole defined by a boundary loop. To accomplish this, meshmixer automatically creates a planar mesh patch and deforms it to exactly fit the hole boundary.
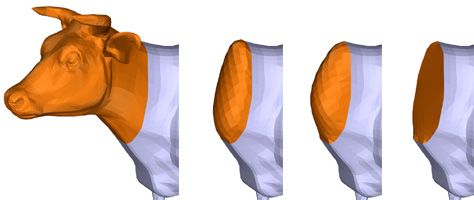
meshmixer has three types of fill surface for you to choose from. In the image below, the three different options are shown for a specific example. Going from left to right, there is the COILS fill, the RotInvCoord fill, and the Membrane fill.
The properties of the different fill types are explained below.
[COILS Fill Type]
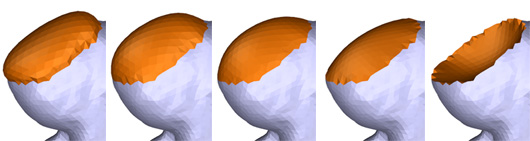
The COILS fill is the default type. It is optimized to produce a continuous transition across the hole boundary, but the interior is not guaranteed to be smooth. There are two parameters available for the COILS fill - Bulge and Scale.
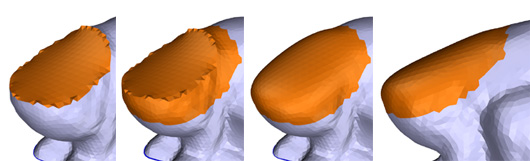
The Bulge parameter is an angle, which can be thought of as the local rotation towards or away from the initial fill surface. So as you increase the angle, the surface will "bulge" outwards, while if you decreas it the surface will fold inwards, as shown in the image below.
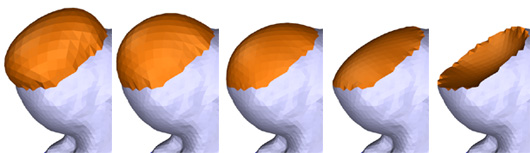
The Scale parameter scales the fill surface before it is deformed to fit the hole, so increasing it means that there is "more surface" that needs to fit inside the hole. This also causes the fill to bulge outwards, but it bulges in the middle, so the boundary transition remains smooth.
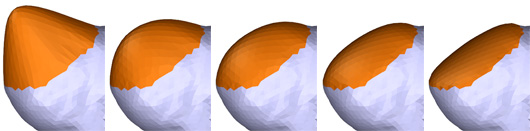
[RotInvCoord Fill Type]
The RotInvCoord fill surface has the advantage of being smooth across the interior, however it may not be as smooth at the boundary, and usually tends to produce a "flatter" fill surface.
For the RotInvCoord fill, the Bulge parameter is again used as a local rotation angle along the boundary, which has a similar effect as in the COILS fill.
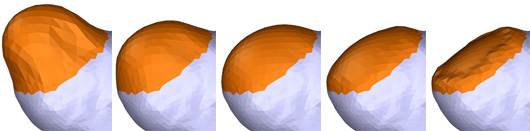
The Scale parameter also has a similar effect on the RotInvCoord fiill. When increasing Scale, the surface tends to become more "pointy". Decreasing Scale causes the fill to flatten out, and in the limit (0 scale) the result is the same as the Membrane fill type.
[Membrane Fill Type]
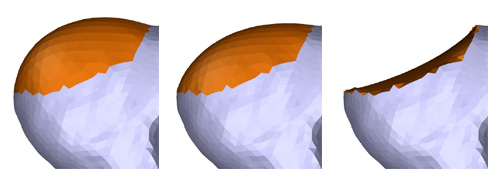
The Membrane fill type creates a fill surface with minimal area, essentially one that is as "flat" as possible. The image below compares the COILS, RotInvCoord, and Membrane fills on another example.
The Membrane fill is most useful for creating fills with hard edges. However, if combined with the Smoothing Tool it can be used to construct surfaces that cannot be created by filling alone. In the example below, a Membrane fill is first used to create a hard-edge fill. Then a region around the fill interior is selected and smoothed, creating a flat area with a smooth transition.